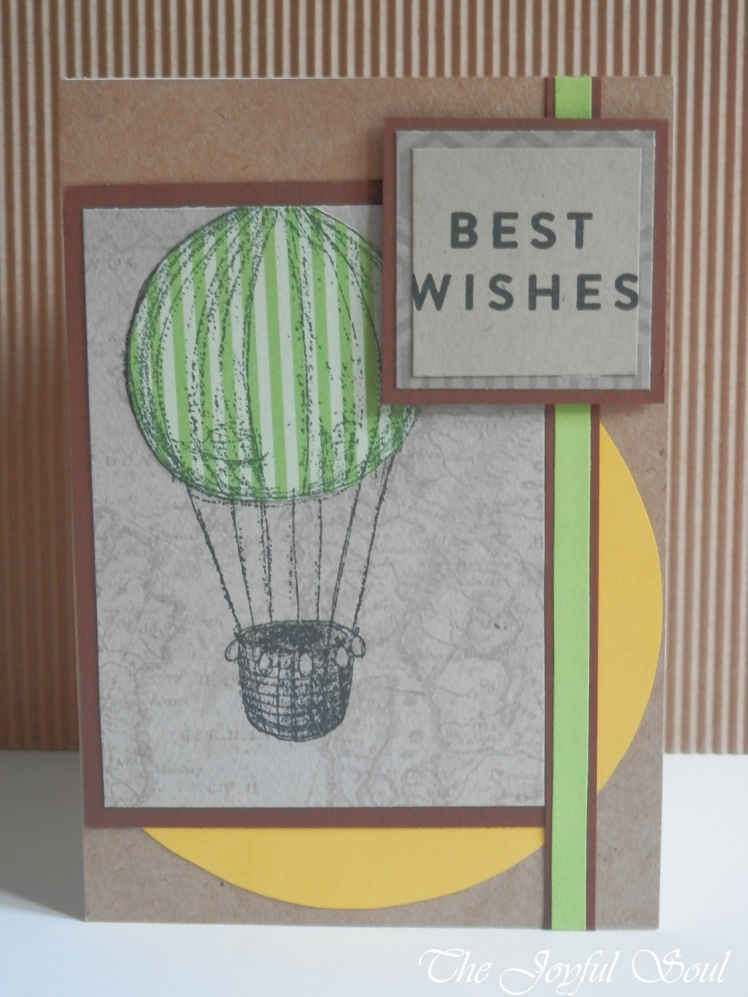
 I really enjoyed making today’s card. I did something I haven’t done in a while, and actually made a (at least vague) written plan before starting. I did find it helpful and may try to get back into the habit of doing it.
Anyway, I made this card as a response to a fair number of challenges. The fabulous layout comes from Mojo Monday, whilst the colour scheme was given by Color Throwdown. Simon Says Stamp Monday provided the world traveler theme and the masculine leaning of the card comes from Craft Rocket Challenges, Double “D” Challenges, and Time Out Challenge. A Bit More Time To Craft and Seize The Birthday have anything goes challenges at the moment, with Seize The Birthday‘s requiring (of course!) for the card to be for a birthday. And I of course decided to include Craftyhazelnut’s Patterned Paper challenge.
 My starting point was to go through my stash of paper and pull out everything that would meet the colour scheme. Anything with brown, green or yellow got pulled out into a pile ready to be chosen from. From the moment I’d seen the travel theme I knew I wanted to use the pale brown patterned paper with the map on it, so I used that as my starting point. Initially I was thinking that would be used for the circle part of the sketch.
With a selection of papers ready to hand I went looking through my stamps to find something appropriate to use on the image panel. I decided the balloon from Panduro’s Hobby Balloon set would be perfect. It was at this moment that I had the idea to use the map paper as the backing of the image, with the balloon flying over it.
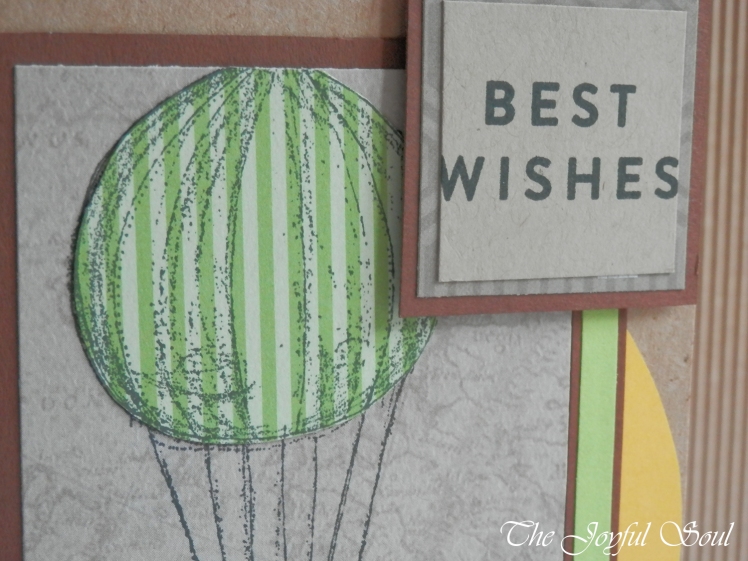
I cut the map paper to size and carefully stamped the balloon on to it. I stamped it a little high on purpose, cutting the heart off the top of the balloon. I also stamped it towards the left of the paper rather than centrally, as I knew the sentiment panel would end up overlapping it. Next I needed to chose the paper for paper piecing the balloon. I considered using two or three different coloured plain papers, but remembering how fiddly it had been when I’d done that previously I decided to go for just one paper. I went for a patterned paper in stripes of green, stamped the top of the balloon onto that and cut it out.
I wanted to mat the image panel so I took some dark brown paper and used that to create a matting panel. I then went on to create the sentiment panel for which I used a light kraft coloured paper which I cut to size. I found a coordinating patterned paper to mat it onto, and then made another mat with the dark brown paper.
I decided I would use a yellow paper to make the circle, as I hadn’t yet found a way to include the required yellow. I actually didn’t do a full circle – I just cut enough of the circle to fit in behind the paper (making kind of an L shape with curves).
For the strip down the side I used a strip of green that coordinates well with the green paper on the balloon. I decided to mat that too, again using the dark brown paper.
At this point I started laying things out and decided I didn’t want the white of the card base to show through, so I took some kraft coloured paper to use as a base panel. Positioning everything on the base panel I realised I’d made some mistakes with measurements. As I hadn’t originally planned to mat the panels, I’d cut the top parts (the map and the light kraft) to the full size from the sketch, which meant with the mats they were too big. I decided that it didn’t matter for the image panel, but I did go ahead and reduce the size of the sentiment panel and its two mats. I should have stamped the sentiment panel first though because it turned out that I trimmed it just too small such that the sentiment (from Avery Elle’s Petal Panel) overlapped the edges very slightly. I tried to find and alternative sentiment but didn’t have anything that would fit, so I decided to stick with it.
Finally it was just a case of assembling the card. I used a strip of double sided tape to attach the green of the balloon onto its base. I then used my tape roller to adhere the map panel to its mat. I also attached the sentiment panel to its mats with my tape runner. For the strip I decided to use my Tombow Multi Mono Liquid Glue as the strip was too narrow for using my roller. I positioned the partial circle onto the base panel and adhered that with the tape runner, then used it to stick the image panel down. I used the liquid glue again on the strip, pushing it right up against the image panel, making it almost as though they are sharing a mat. I used foam tape to attach the sentiment panel, giving it a bit of volume. Then I just had to use my tape runner to adhere the whole lot to the card base.
 I’m really happy with how this card turns out. The colours work fabulously, and I think the layout is brilliant. The matting works nicely. I feel that it makes a very nice masculine card, especially for someone who enjoys travelling. I love the look of the balloon over the map, and I think the yellow circle works really well with it as its almost representative of a sun. There are a couple of things I’d like to improve upon. I should have made the sentiment panel slightly bigger so that the sentiment would fit properly. I also probably should have paper pieced the basket of the balloon too, or at least the sand bags(?) hanging from the basket. But overall I’m very pleased.
Love,
Lady Joyful
Love the hot air balloon!
LikeLiked by 1 person
Thanks! It’s a lovely stamp. I’ve got a fair bit of use from it 🙂
LikeLiked by 1 person
I love all the soft patterns in the papers you choose. Thanks so much for playing with us at Time Out!
LikeLiked by 1 person
Thank you Lynn 🙂
LikeLike
What a great masculine creation! Thanks so much for joining in the fun at our Double D ‘One for the Boys’! We hope you’ll come back often.
Darlene
DOUBLE D Challenge Blog
DAR’S CRAFTY CREATIONS Please stop in for a visit!
LikeLiked by 1 person
Thank you Darlene 🙂
LikeLike
Fabulous ‘mans’ card…and a great way to assemble it too! Thank you for joining our challenge at Double D!
Diane DD DT
LikeLiked by 1 person
Thank you so much Diane 🙂
LikeLike
Lovely card and thank you so much for sharing and taking the time to play along with us over on the Simon Says Stamp Monday Challenge Blog… 🙂
LikeLiked by 1 person
Thank you 🙂
LikeLike
Love the layout and the ephemera balloon…great interpretation of both challenges!
LikeLiked by 1 person
Thank you 😀
LikeLike
Great masculine design! Love the paper pieced balloon. Thanks for joining us for this week’s Color Throwdown and at Mojo Monday, too!
LikeLiked by 1 person
Thanks!
LikeLike
Great take on the sketch and wonderful colors. Thanks so much for sharing with us at Double D Challenge Blog this week. We hope you will join us again.
Kathy
DD DT
LikeLiked by 1 person
Thanks Kathy 🙂
LikeLike
Great image! Thanks for joining us at Craft Rocket, Claire DT x
LikeLiked by 1 person
Thanks Claire 🙂
LikeLike
Fun card! Thanks for joining in at STB~
LikeLiked by 1 person
Thanks 🙂
LikeLike
Great work! Thank you for playing with us at TO challenge! 🙂
LikeLiked by 1 person
Thanks! 🙂
LikeLike
This is gorgeous. Love your color choices and great layout. Thanks for sharing with us at Double “D” Challenge .
Amelia (Double “D” Challenge Design Team)
LikeLiked by 1 person
Thanks so much Amelia 🙂
LikeLike