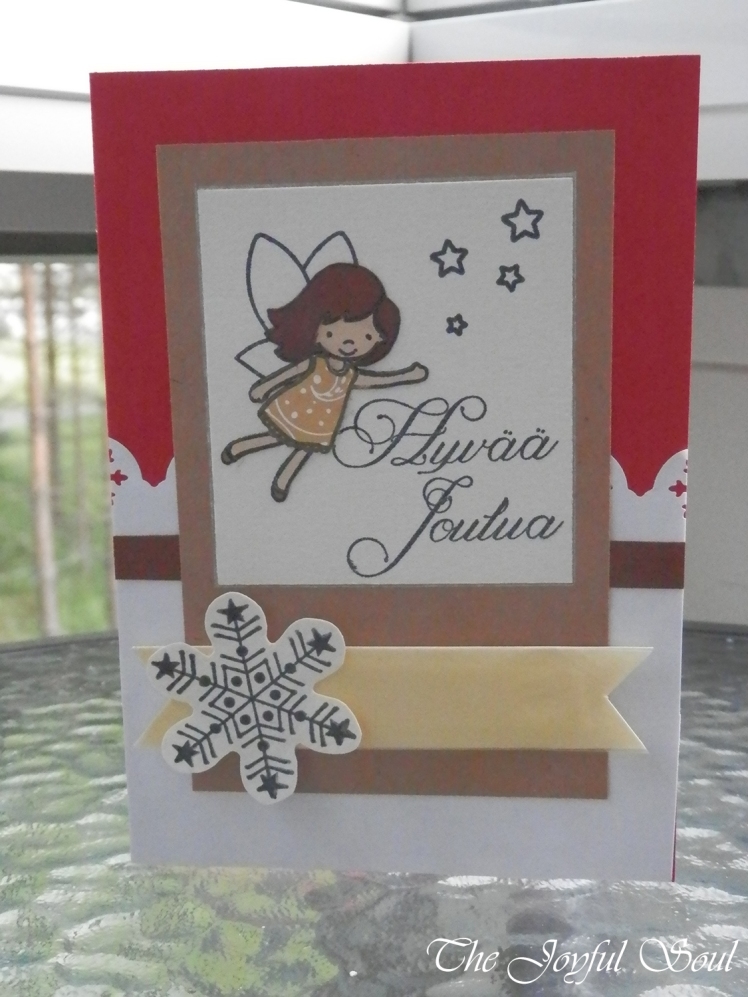
 I decided to make another fairy card today, this one with a Christmas theme. It’s a response to rather a lot of challenges. One Crazy Stamper, Craftyhazelnut’s Christmas Challenge, and Craftyhazelnut’s Christmas Challenge Extra all look for a Christmas theme. The colour scheme comes from Color Throwdown – I thought it would be fun to use a non-traditional colour scheme on a Christmas card, though it turned out more difficult to do than I’d realised! Tuesday Throwdown asked for fairies or fantasy, whilst Pixie’s Snippets Playground requested using snippets. None of the sketch challenges I have in my list seemed fitting for what I wanted to do, so I went and hunted one down. I settled for this Mojo Monday sketch from a couple of years ago.
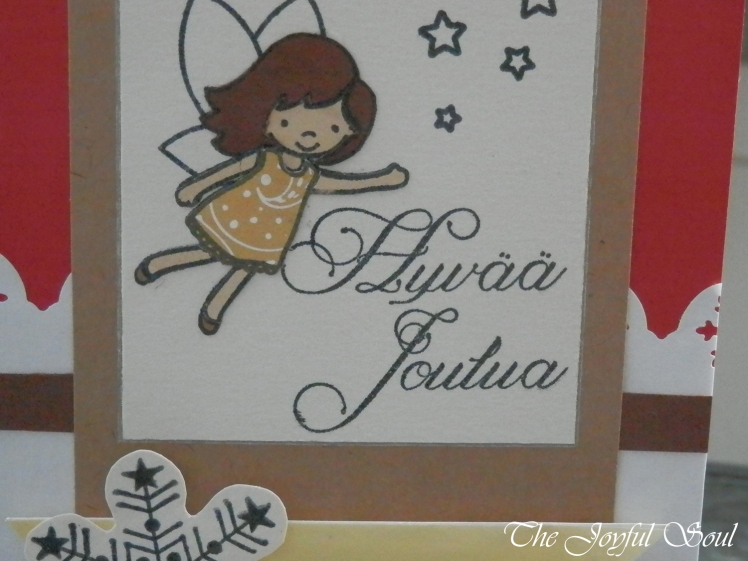
 I started the card by working on my image panel. I picked out one of the fairies from Avery Elle’s Pixie Dust set and stamped her onto a square snippet of white card using Memento Tuxedo Black ink. I then started paper piecing. I actually ended up making three different versions of the dress because I wasn’t sure which one to use. All three were from Christmas patterned papers. I ended up settling on the muted yellow that you can see in the image. I used a deep chocolate brown for her hair, a lighter brown for her shoes (which were very fiddly to place!) and a pale peach/tan colour for her skin. Pretty much all the papers I used here were snippets. I used Tombow Multi Mono Liquid glue to stick all the pieces in place. At this point I also stamped the sentiment.
Next I trimmed a snippet of kraft coloured paper to make the frame for the image panel. I decided to make a red card base so folded that from a fresh piece of red card, then took a snippet of white paper and used my snowflake border punch to make a border along it. I cut a snippet of the same chocolate-brown card that I had used for the fairy’s hair to make a border strip for going along below the snowflake border.
 Incorporating the pale yellow was a bit of a trickier task. I don’t have any pale yellow paper, nor any suitable inks for making my own. I tried colouring a snippet of paper with yellow pencil but it didn’t look right. Then I remembered the yellow vellum I have and decided to use that overlaid on (the uncoloured side) of the strip of white paper. It seemed to work perfectly! I stuck the vellum to the white card, being conscious of where the adhesive was so that I could hide it, then cut the ends to form the banner shape.
At this point I began assembly. I used my tape runner to stick the image panel to the kraft base frame part. I decided to draw around the edge of the image panel with silver pen for a bit of added interest. I then used the tape runner to attach the white border punched panel to the lower portion of the card and trimmed the edges off to make it fit properly. I actually stuck it slightly wonky, but thankfully it isn’t obvious! I again used the tape runner for the chocolate-brown band which I adhered just below the snowflake border. The kraft panel was also adhered using the tape runner.
I then decided the image panel was missing something. I considered giving the fairy a wand, but instead decided to add some stars almost as if they were coming up from her outstretched hand.
With that done I adhered the banner using foam tape. I needed some sort of embellishment to go on top, as called for in the sketch, which would hide the adhesive I’d used to attach the vellum. I decided on a large snowflake – I can’t find information on where it’s from, sorry! Some generic brand stamp I think. I liked that its pattern has stars which ties in nicely with those on the image panel. I stamped it in the same black ink onto a scrap of white card, fussy cut it, and used my tape runner to attach it to the banner.
 I’m pretty happy with how this card turned out. As you can see, my attempt at using non-traditional colours wasn’t entirely successful as the traditional red and white ended up dominating. Nevertheless I think I incorporated the other colours nicely. Looking at it now I feel like the wings and the stars feel unfinished. The Wink of Stella brush is on my wishlist, and I think a bit of that on the wings especially would give a nice finishing touch. I will have to remember to go back to the card and add that once I’ve bought it!
Love,
Lady Joyful
What a lovely, cute card. I am all for a variety of colour schemes for Christmas. It’s nice to change things up a bit and the kraft base for your image definitely works.
LikeLiked by 1 person
Thank you! Yes, I think varying colour schemes is a good idea. I was finding it quite difficult to do though – I guess there’s a bit of a mental block I need to overcome there! My brain kept trying to insist that her dress should be red!
LikeLiked by 1 person
I know what you mean. Give your brain some complicated maths to do and then you can carry on whilst it is distracted! Unless you are a maths genius and then this plan won’t work at all…
LikeLiked by 1 person
Ha, definitely not a maths genius! I’ll have to give that a try 😀
LikeLiked by 1 person
That’s a lovely card! I always get cross at Christmas since all the cards I see have robins on them-not that I have anything against robins!- but it’s nice to see something so different!
LikeLiked by 1 person
Maybe I should invest in a robin stamp set in your honour 😉 Glad you like the card 😀
LikeLiked by 1 person
Nooo! Mind you…I would be quite interested to see what you would do with them…!
LikeLiked by 1 person
Well now I’m even more tempted! Robins are one of my grandmother’s favourite birds so it actually might be worth me trying to find some…
LikeLiked by 1 person
It would be nice to see what you could do with them…can you get the cartoon type robin stamps as well as the bird ones?
LikeLiked by 1 person
I’m sure it’s possible 🙂 Seems like if you can imagine it, there’s a stamp of it! Just a case of seeing what I can find here in Finland.
LikeLiked by 1 person
Obviously you can get leaves and stuff.. can you get ivy leaves? Just curious…
LikeLiked by 1 person
A quick search found me a few – different sizes, some on their own, others as a vine, and even a set that is words with ivy leaves as the flourishes.
LikeLiked by 1 person
Ha ha! Yes they sound really good! Like the sound of the wordy leaves : )
LikeLiked by 1 person
Now that’s being on the ball by creating this sweet Christmas card! So glad you were able to play along with us at Color Throwdown!
LikeLiked by 1 person
Thank you. It was a fun challenge to work those colours in 😀
LikeLike
Super card Charlotte and I do love the different colours you used. I stick to really tried and tested Christmas combinations and should be braver!
Hugs
Di xx
LikeLiked by 1 person
Thanks Di! Like I said, I actually found it pretty hard using the different colours. Definitely an interesting experience!
LikeLike
What a delightfully sweet card! The design is eye catching and I love the color palette on your design. Thanks for joining in on the fun at Tuesday Throwdown.
We look forward to seeing you again.
Hugs
Berni,DT
tuesdaythrowdown.
LikeLiked by 1 person
Thank you Berni 😀
LikeLike
Lovely card!! A head start on Christmas cards- good for you!! So glad you joined us at CTD!!
LikeLiked by 1 person
Thanks!
LikeLike
Super cute card! That little fairy image is adorable! I’m really glad you shared this cutie with us at CHNC Extra! 🙂
~Marie B -DT
LikeLiked by 1 person
Thank you 🙂
LikeLike
Love the non traditional colours on this super cute Christmas card! Thank you for sharing it in our challenge at One Crazy Stamper.
LikeLiked by 1 person
Thank you 🙂
LikeLike