A few days ago I had the idea of stamping through a stencil. It was an idea that seemed good in my head but didn’t quite work out in practice. (I still like the idea and am going to have another try at it soon, learning from the mistakes I made this time.) I didn’t want to give up on the card completely, so I ended up making this card instead. This card used a lot of elements from Simon Says Stamp’s Blissful card kit, but I did also bring in a few other things.
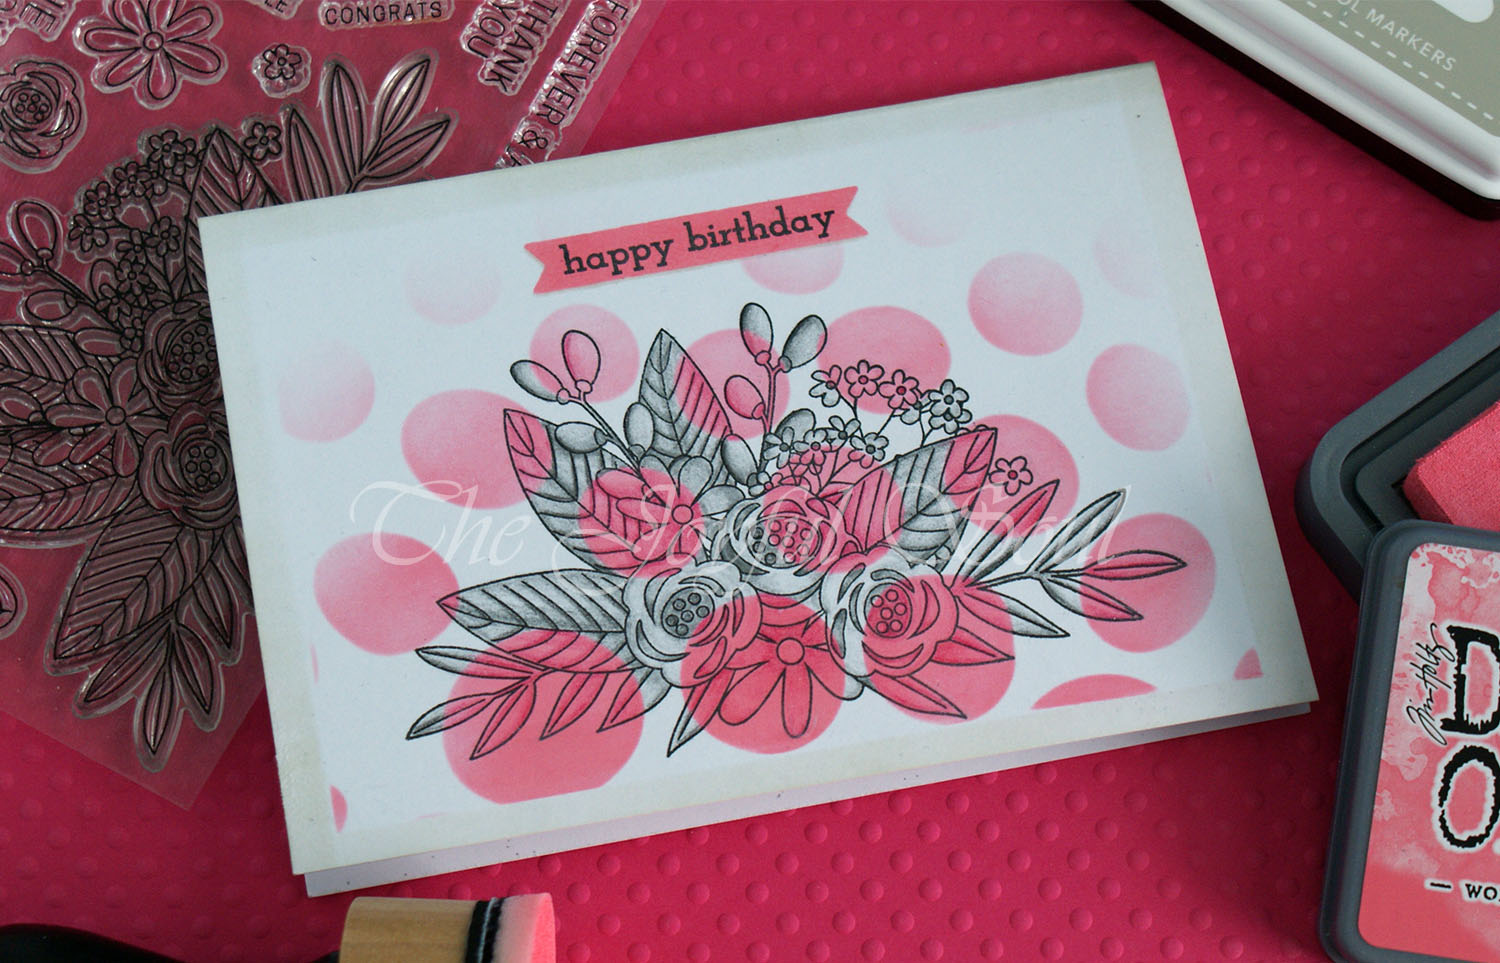
I started by laying the Marabu Growing Dots stencil over my card base and using post-it note to hold it in place. The tape doubled as a mask to keep the ink off of the edges of the card. I then used the Worn Lipstick Distress Oxide which came with the kit to ink blend over the stencil, concentrating my colour towards the bottom centre and fading out as I went towards the edges and top of the card.
After removing the stencil I placed the card base into my MISTI and lined up the large flower arrangement stamp from the Floral Bliss stamp set. I stamped it with MFT Black Licorice Hybrid Ink. I then used coloured pencils to add shading to the image. I used two shades of pink for the areas that were on the ink blending. For the white areas I used grey and a touch of black. Most of the shading effect comes from simply adjusting the pressure of the pencil.
Although this card is one layer I wanted to give the impression of some dimension. I wanted to make it look as though the stencilled and stamped area is a panel on the card base, so I masked off the card such that the outer edges were showing, then lightly sponged over them with SSS Barely Beige ink. This gave a subtle differentiation between the ‘panel’ and the card base.
Next I added my sentiment. I used the banner die from Carta Bella’s Forever die set to cut myself a mask, turning the die to get the flag tail on either end. I placed the resulting banner on my card to work out the positioning, then laid the negative portion over the top and removed the banner. I then ink blended the Worn Lipstick over the top. Once I was happy with the coverage I laid the banner mask back in place and very slightly offset the negative mask before sponging on some of the Barely Beige ink to give a slight drop shadow, giving the impression of dimension.
Finally I removed the masks and lined up my sentiment, from Altenew’s Super Script, and stamped it with the Black Licorice ink.

I am very happy with this card. It’s not perfect, and there are certainly ways in which it could be improved, but I learned a lot in the process of making it, I had fun with it, and it turned out pretty well! I enjoyed adding the shadowed faux-dimension. I think I could perhaps have been a bit bolder with it, adding a little more to make it more obvious. I would like to play with it some more when I make future one layer cards.
Love,
Lady Joyful
Challenges included:

AAA Cards – Birthday
Muse – Inspiration Card (The elements I took inspiration from were the stencil, ink blending, monochrome flowers, banner, and colour scheme.)


Seize the Birthday – Birthday and One Layer

Watercooler Wednesday – Anything Feminine Goes (edit – where it was chosen as Watercooler Rockstar!)

Oh Charlotte, what a lovely card! The pink “growing dots” on the white background are just perfect behind the stamped black image of the large floral arrangement. Shading the image slightly using your pencils was a brilliant move and makes such a difference. Love all the masking you’ve done. Such attention to detail! Thanks so much for joining our Watercooler Wednesday Challenge this week.
LikeLiked by 1 person
Thank you 😀
LikeLike
Wow, this is such a great design. I love how my card inspired you and the shading you added to your image, over and between the stencilling looks fabulous. A one layer triumph!
Thanks so much for playing along at Muse this week, Anita x
LikeLiked by 1 person
Thank you Anita 😀
LikeLike
Very pretty one layer card. Love the pink & gray color combo. Thanks for sharing with us at Seize the Birthday.
LikeLiked by 1 person
Thank you 🙂
LikeLike
Very pretty. Love the dotty background. Hugz
LikeLiked by 1 person
Thanks!
LikeLike
Pink and grey – what a fabulous colour combo. And I love how you’ve added the colour to the stamped image, really gorgeous. Thanks for your support by joining in with AAA Cards 3rd birthday celebrations so many times..
LikeLiked by 1 person
Thank you 🙂
LikeLike
Lovely design – reminds me of Poole pottery designs!
LikeLiked by 1 person
Thank you! 🙂 I’d not heard of those so looked them up – now I have more inspiration for cards 😀
LikeLiked by 1 person
Oh good, I’m pleased you like them!
LikeLiked by 1 person
Love, love love this card! I especially love your thought process. Just beautiful.
LikeLiked by 1 person
Thank you 😀
LikeLike
Such an elegant card and great design!
Love the pink and grey combo.
Nice take on Anita’s card!
LikeLiked by 1 person
Thank you!
LikeLike
Fabulous card, love the design. Thanks for joining our birthday celebration at AAA Cards!
LikeLiked by 1 person
Thanks!
LikeLike
This is beautiful! I love how the various-sized dots almost seem to line up with some of the gray blooms! Thanks so much for joining us at Muse this week!
LikeLiked by 1 person
Thank you 🙂
LikeLike
Charlotte this is such an amazing card. I’m really impressed with the level of dimension you were able to achieve with the faux dimensional border and the pencil colouring. Very impressive indeed. Thanks for joining us at the WWC122 Watercooler Challenge this week.
LikeLiked by 1 person
Thank you 😀 It was a lot of fun trying to get that appearance of dimension.
LikeLike
I think this is a lovely card and it really pops. Thanks for joining in with us at Watercooler Wednesday Challenge this week.
LikeLiked by 1 person
Thank you 🙂
LikeLike
Such a beautiful card!!! I just love all the layers. Thank you for linking up with my Feminine ‘Anything Goes’ challenge this week!
LikeLiked by 1 person
Thank you 🙂
LikeLike
Very Lovely card! Thanks for joining us at Watercooler Wednesday Challenge!
LikeLiked by 1 person
Thank you 🙂
LikeLike