
Time for another one of my I’ve-been-working-on-this-for-ages videos! This one has been in the pipeline for several months and I just kept not managing to finish it, but it is finally here. I’m using some of the newer stencils from Skull and Cross Buns and taking a look at some fun ways to make use of stencils. Hopefully you’ll learn something new!
Card 1 – Soft Ink Blending
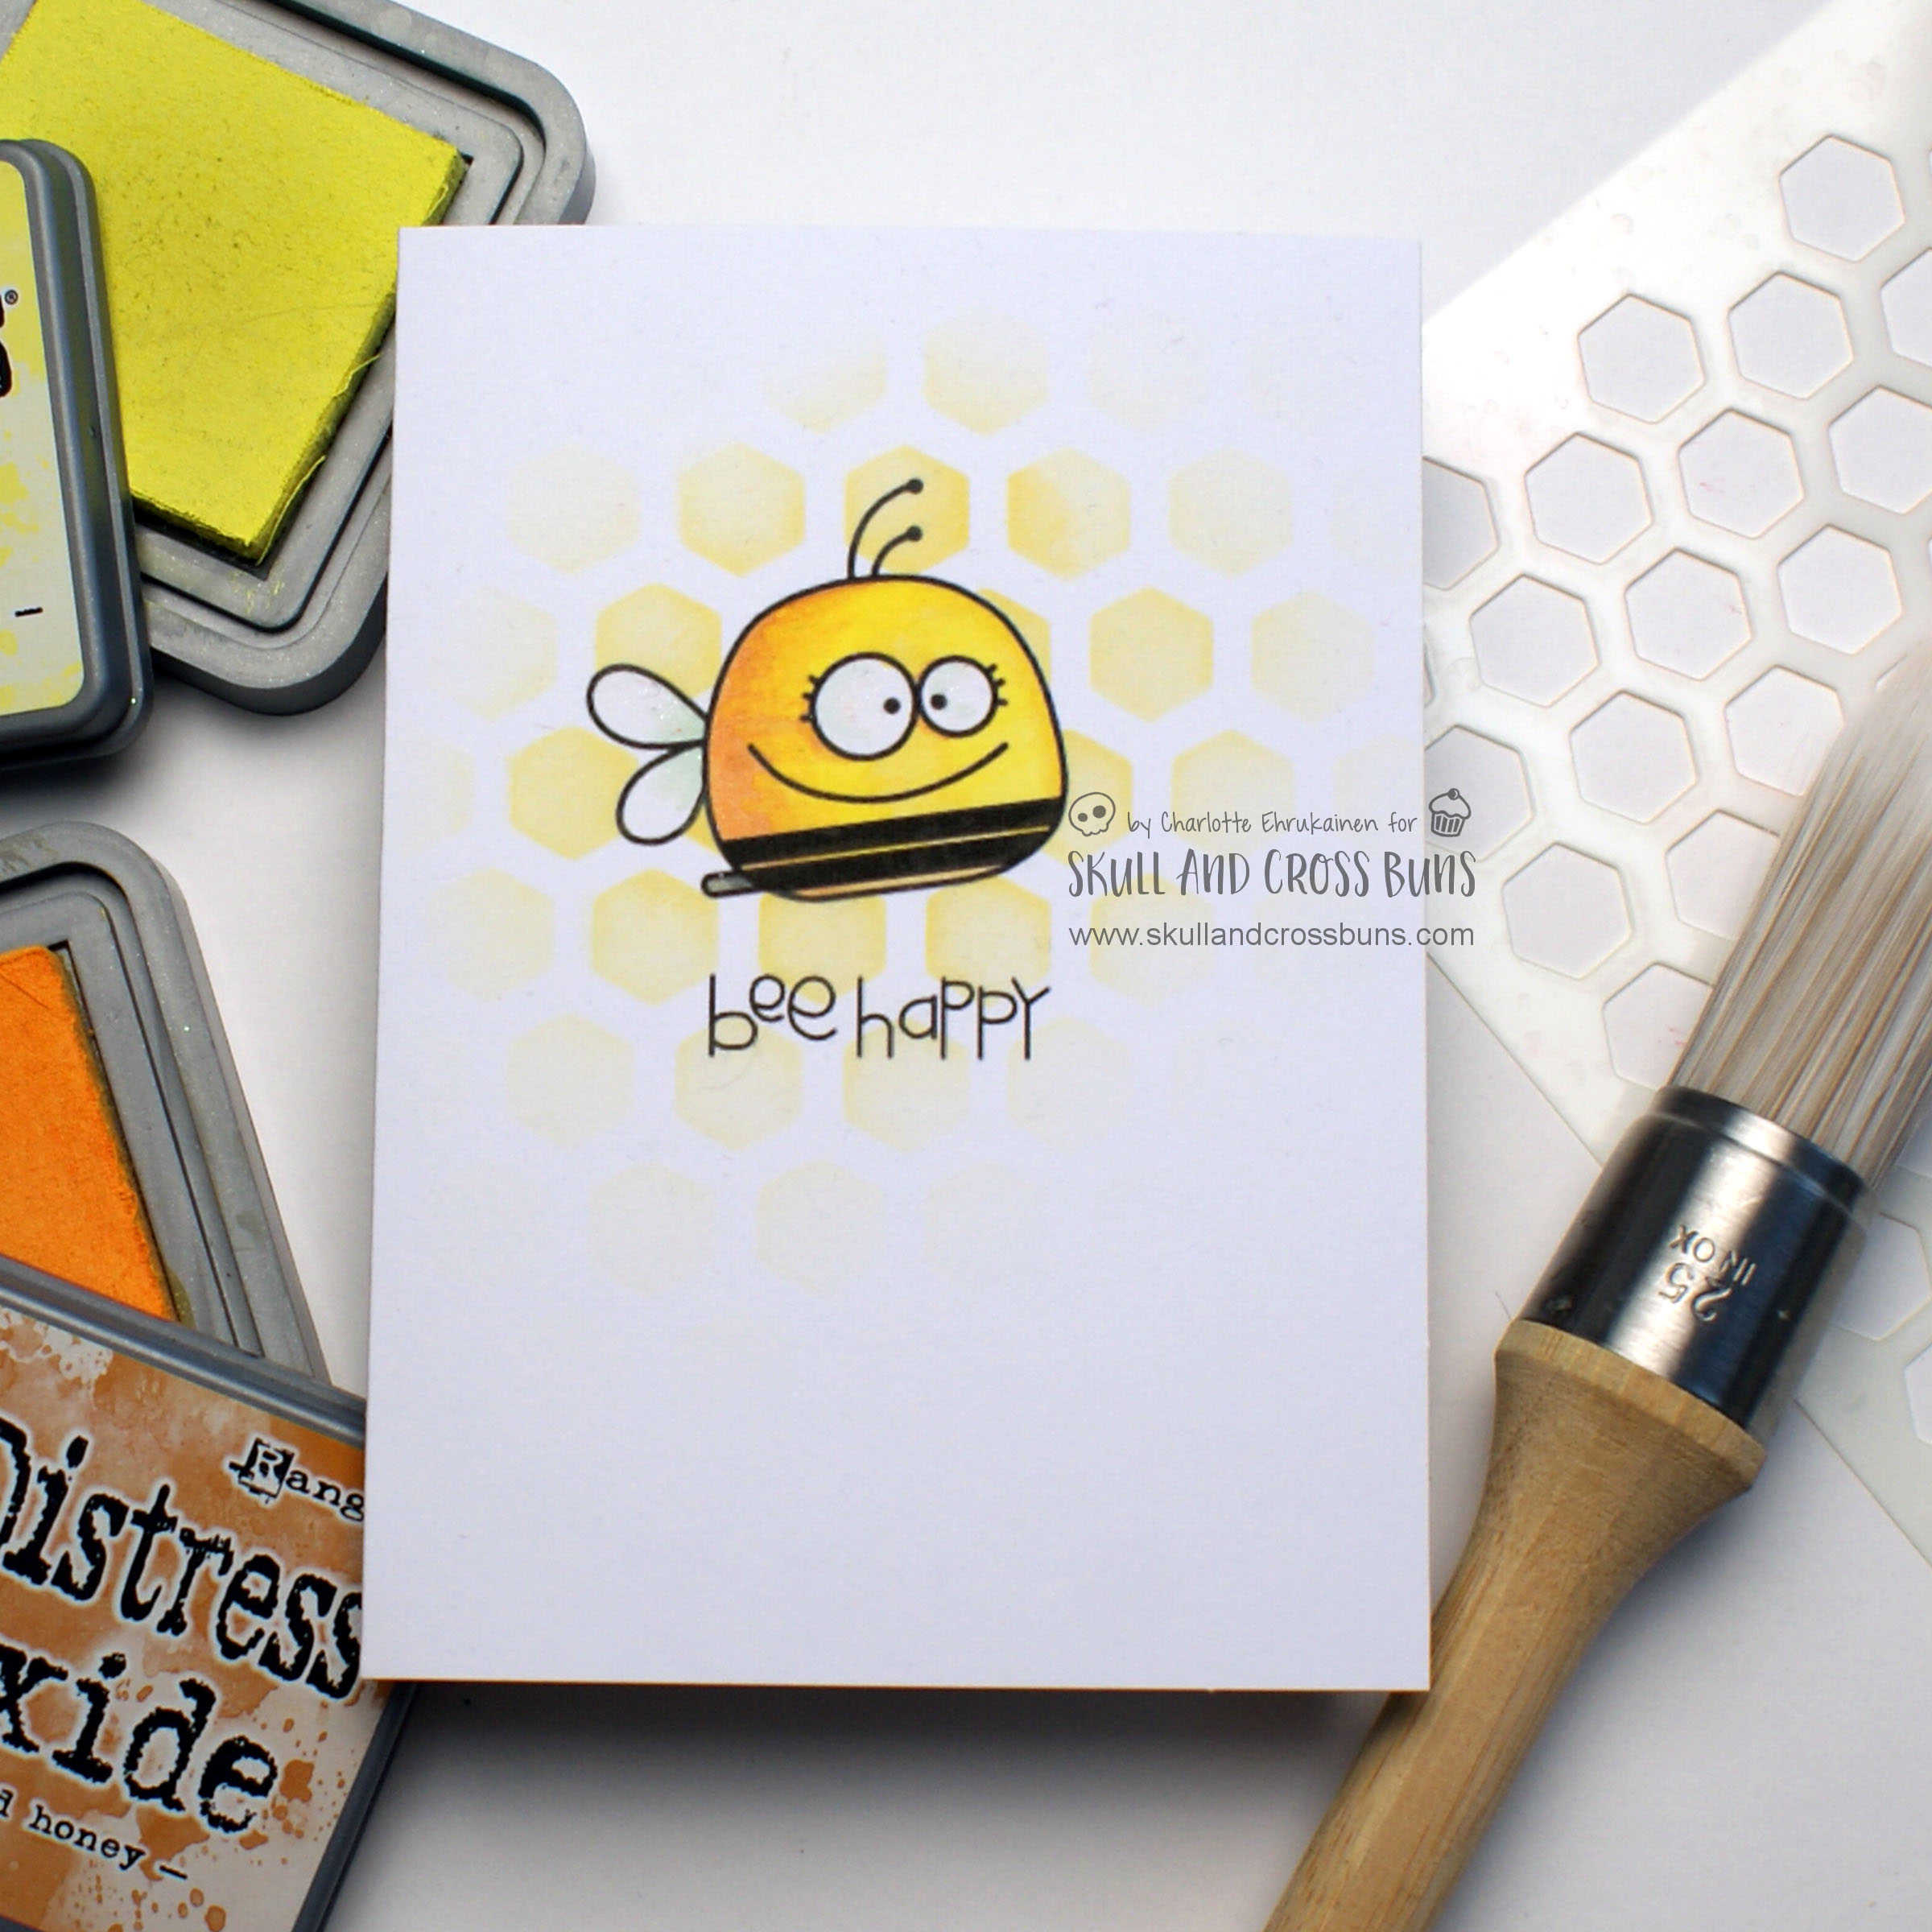
For my first card I started by printing a free digi from Paper Smooches onto my card base, and masking it off. I then placed the honeycomb hexagons stencil over the card base, holding it in place with repositionable tape. I used my Scrapbook.com stencil brushes to start applying colour. I first used a light layer of Squeezed Lemonade Distress Oxide and then darkened up the centre area with Wild Honey. I kept the colour light, fading out as it got further from the focal image.
Once I’d finished the ink blending I removed the mask and used my Spectrum Noir Illustrator markers to colour in the image and finished it off with a touch of Nuvo Aqua Flow Shimmer pen for a little sparkle.
Challenges:

Addicted to CAS – One Layer (edit – where it was chosen as one of the top 3!)
CAS On Friday – Use A Stencil (edit – where it was the chosen winner!)

Less Is More – One Layer & Stencils

Paper Smooches – Include Words
STAMPlorations CAS Card Challenge – Anything CAS
Card 2 – Watercolour Stenciling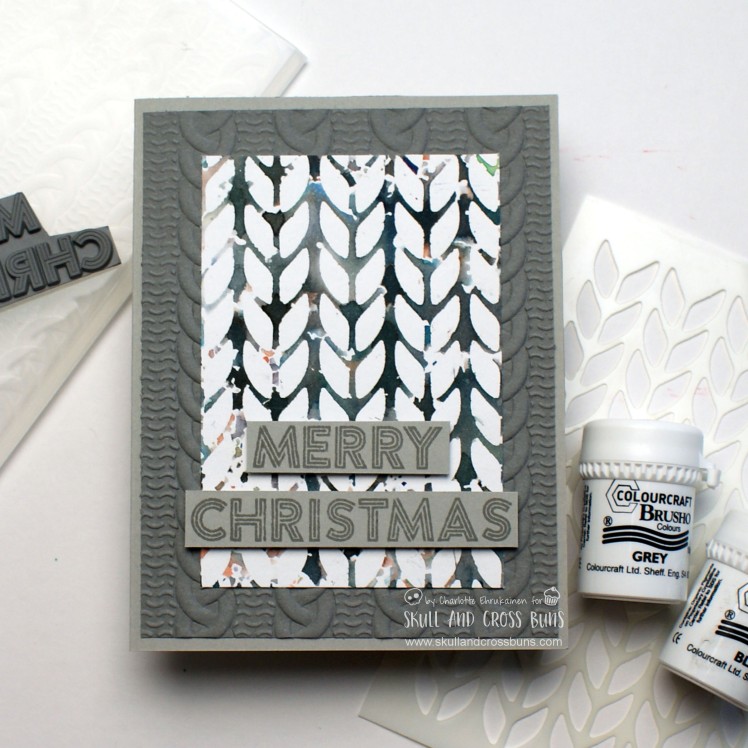

I used the knit stencil for my second card. I placed it over a piece of watercolour paper and sprinkled Brusho powder in both grey and black over the stencil. I then spritzed with water to get the colour moving. Next I flipped the stencil over onto another piece of watercolour paper and pressed it down. This created a negative print of the stencil with the colour that was left on it. Previously when using this technique I have taken multiple prints in this way, each getting lighter and looser as less colour is left. This time I did just the one.
I decided to use the negative print of the stencil for my card. I trimmed the panel down to the size I wanted and matted it onto a grey panel which I embossed with a knit embossing folder from my stash. I adhered the matted panel onto a grey card base and finished off with a sentiment using the Merry Christmas Neon Sign stamp which I stamped in Catherine Pooler Twilight ink onto a snippet of grey card.
Challenges:
Classic DT Challenge – Anything Goes
Craftyhazelnut’s Christmas Challenge – Anything Goes and Optional: Embossing

HLS Christmas Challenge – Anything Goes (edit – where it was a DT Favourite!)

HLS Watercolour Challenge – Anything Goes
Merry Little Christmas Challenge – Anything Christmas
Polkadoodles Craft Challenge – Anything Goes
Rudolph Days – Anything Christmas
Card 3 – Dry Embossing
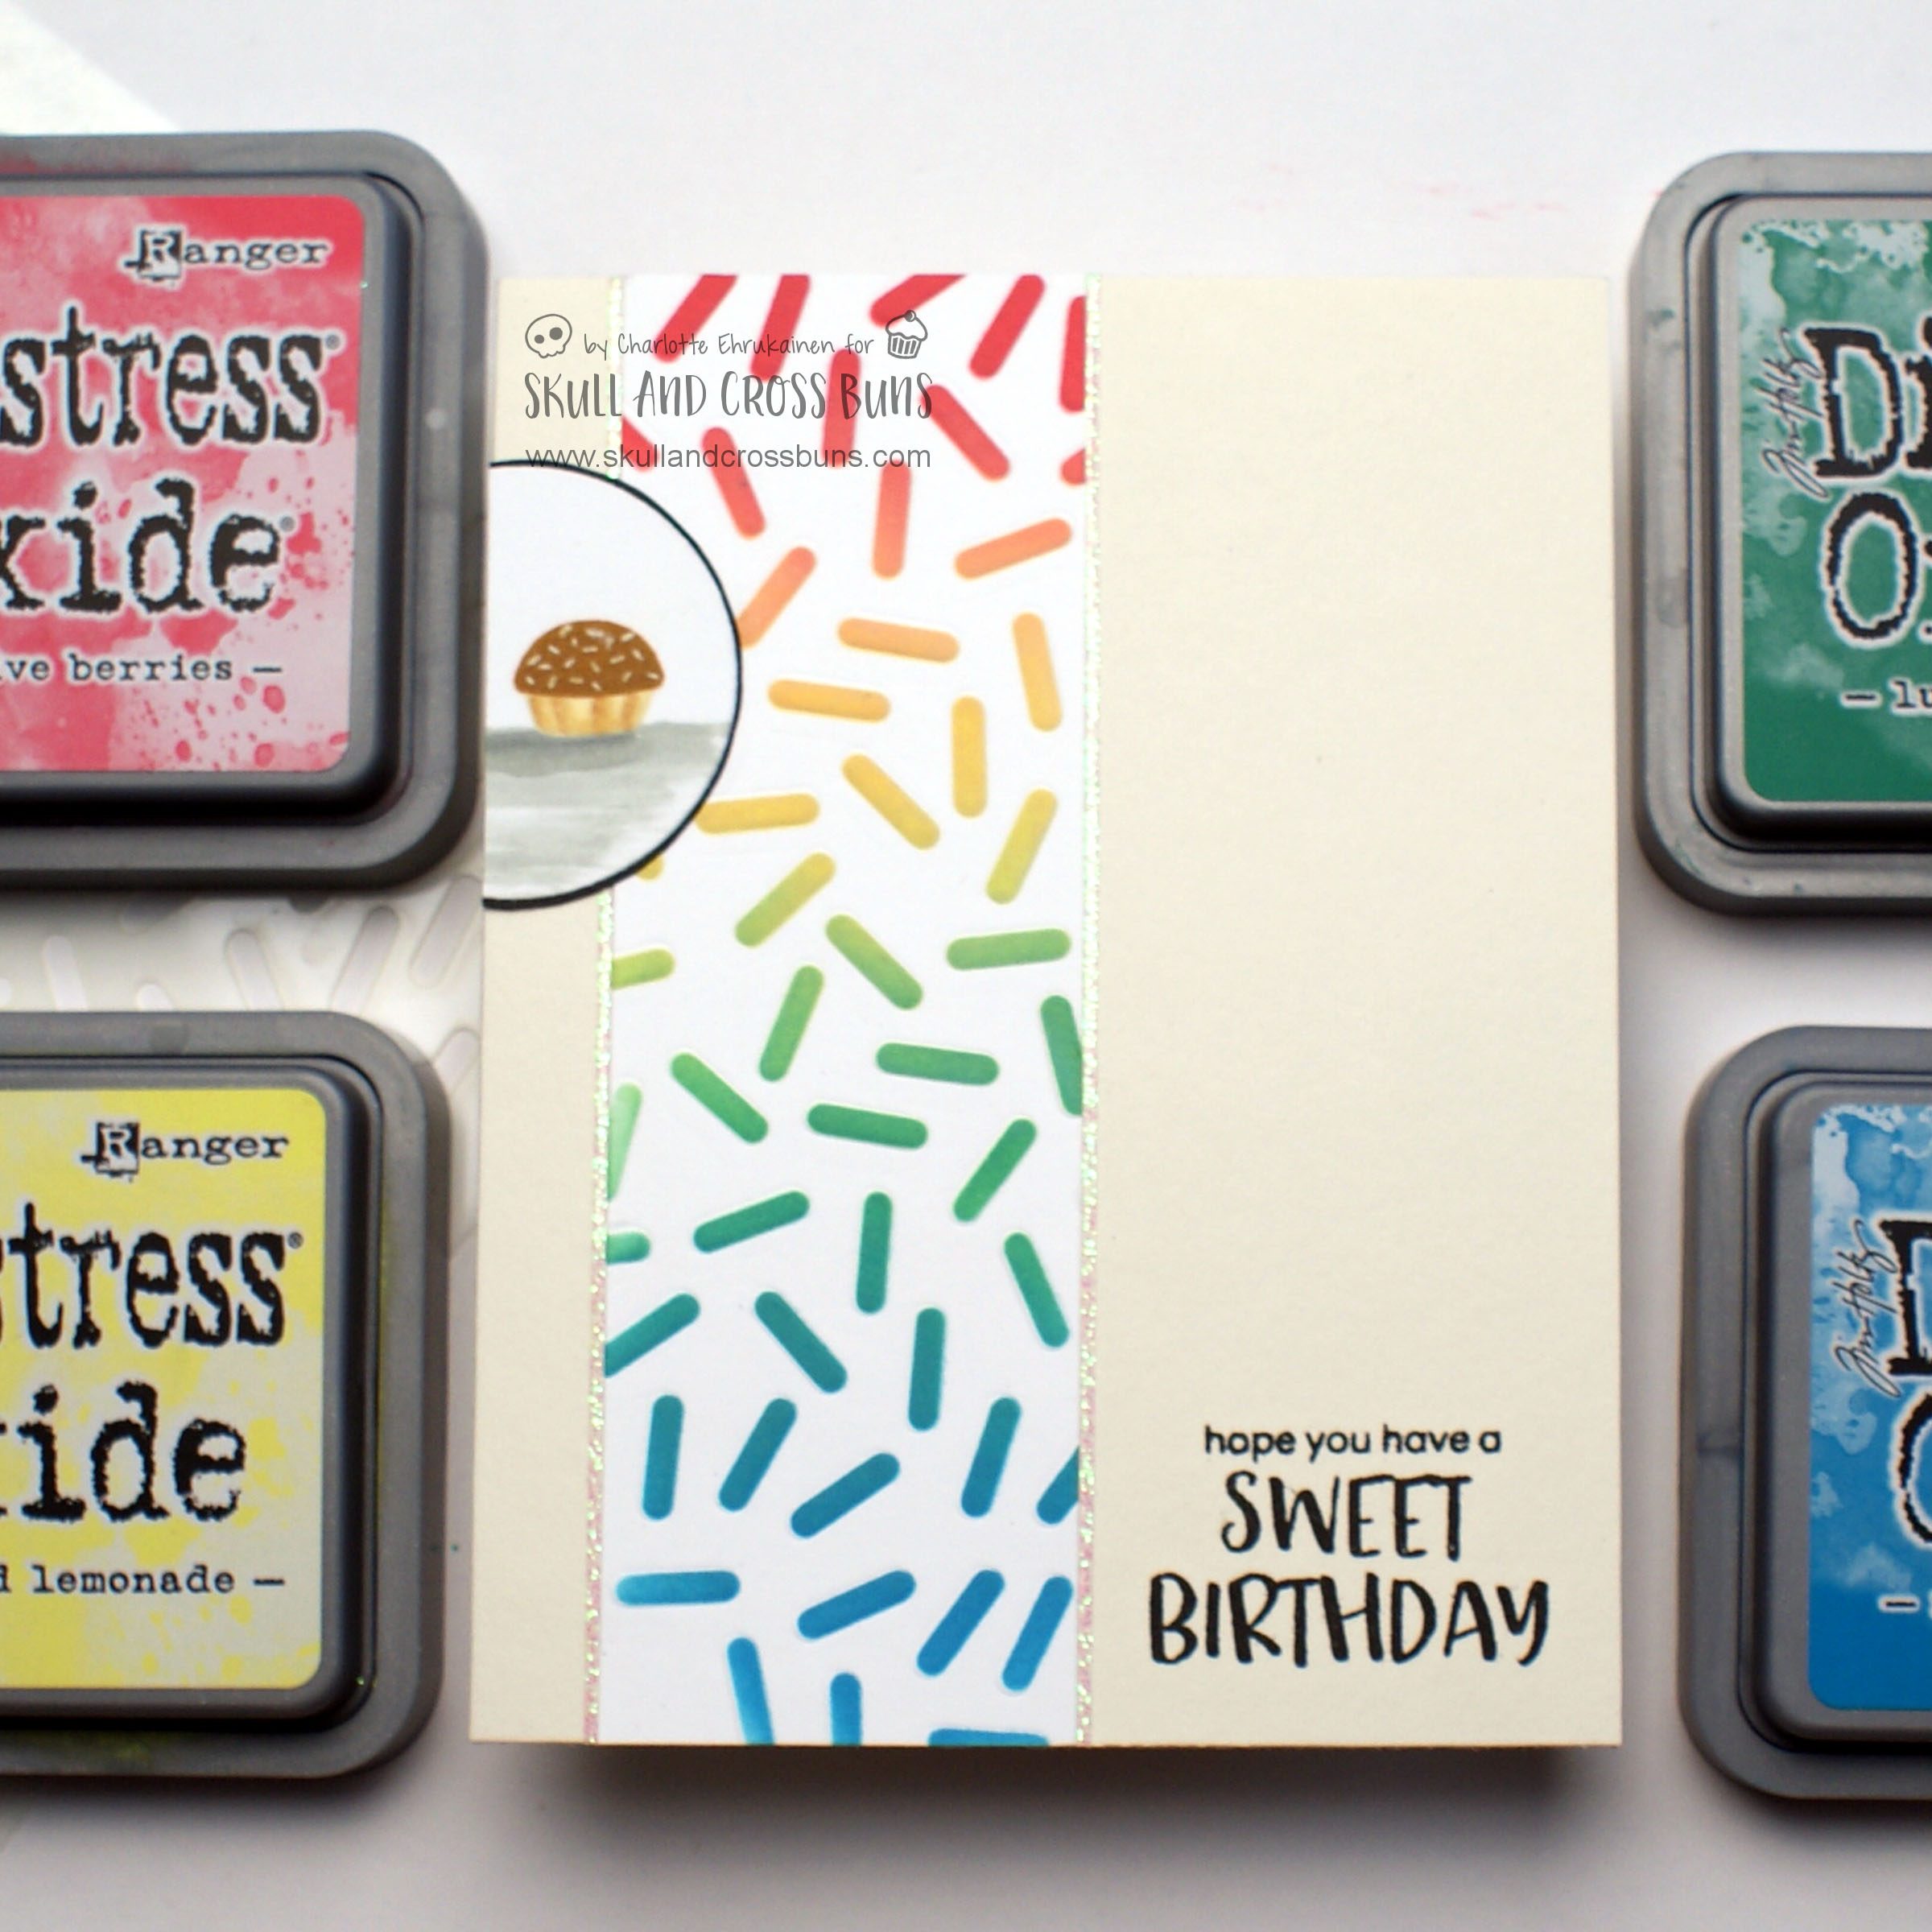
For the third technique I dry embossed with the hundreds and thousands stencil. I used two embossing mats in order to get enough pressure to create the embossing, but different machines may vary in terms of the sandwich required for embossing. After embossing I ink blending a rainbow of Distress Oxides, using Festive Berries, Squeezed Lemonade, Lucky Clover and Mermaid Lagoon, through the stencil to add colour to the embossed sprinkles.
I finished the card by adhering the strip to a cream card base and edging with clear glitter pinstripe peel-offs. I added a cut-off circle focal panel with a no-line coloured cake from Lawn Fawn’s Bun in the Oven. I also added a sentiment using Heffy Doodle’s Happy Snappy Crocs and Ad-Roar-Able Lions.
Challenges:
Simon Says Stamp Monday Challenge – S is For (I went with sprinkles!)

STAMPlorations Theme & Sketch Challenge – Anything Stamping
Card 4 – Selective Heat Embossing
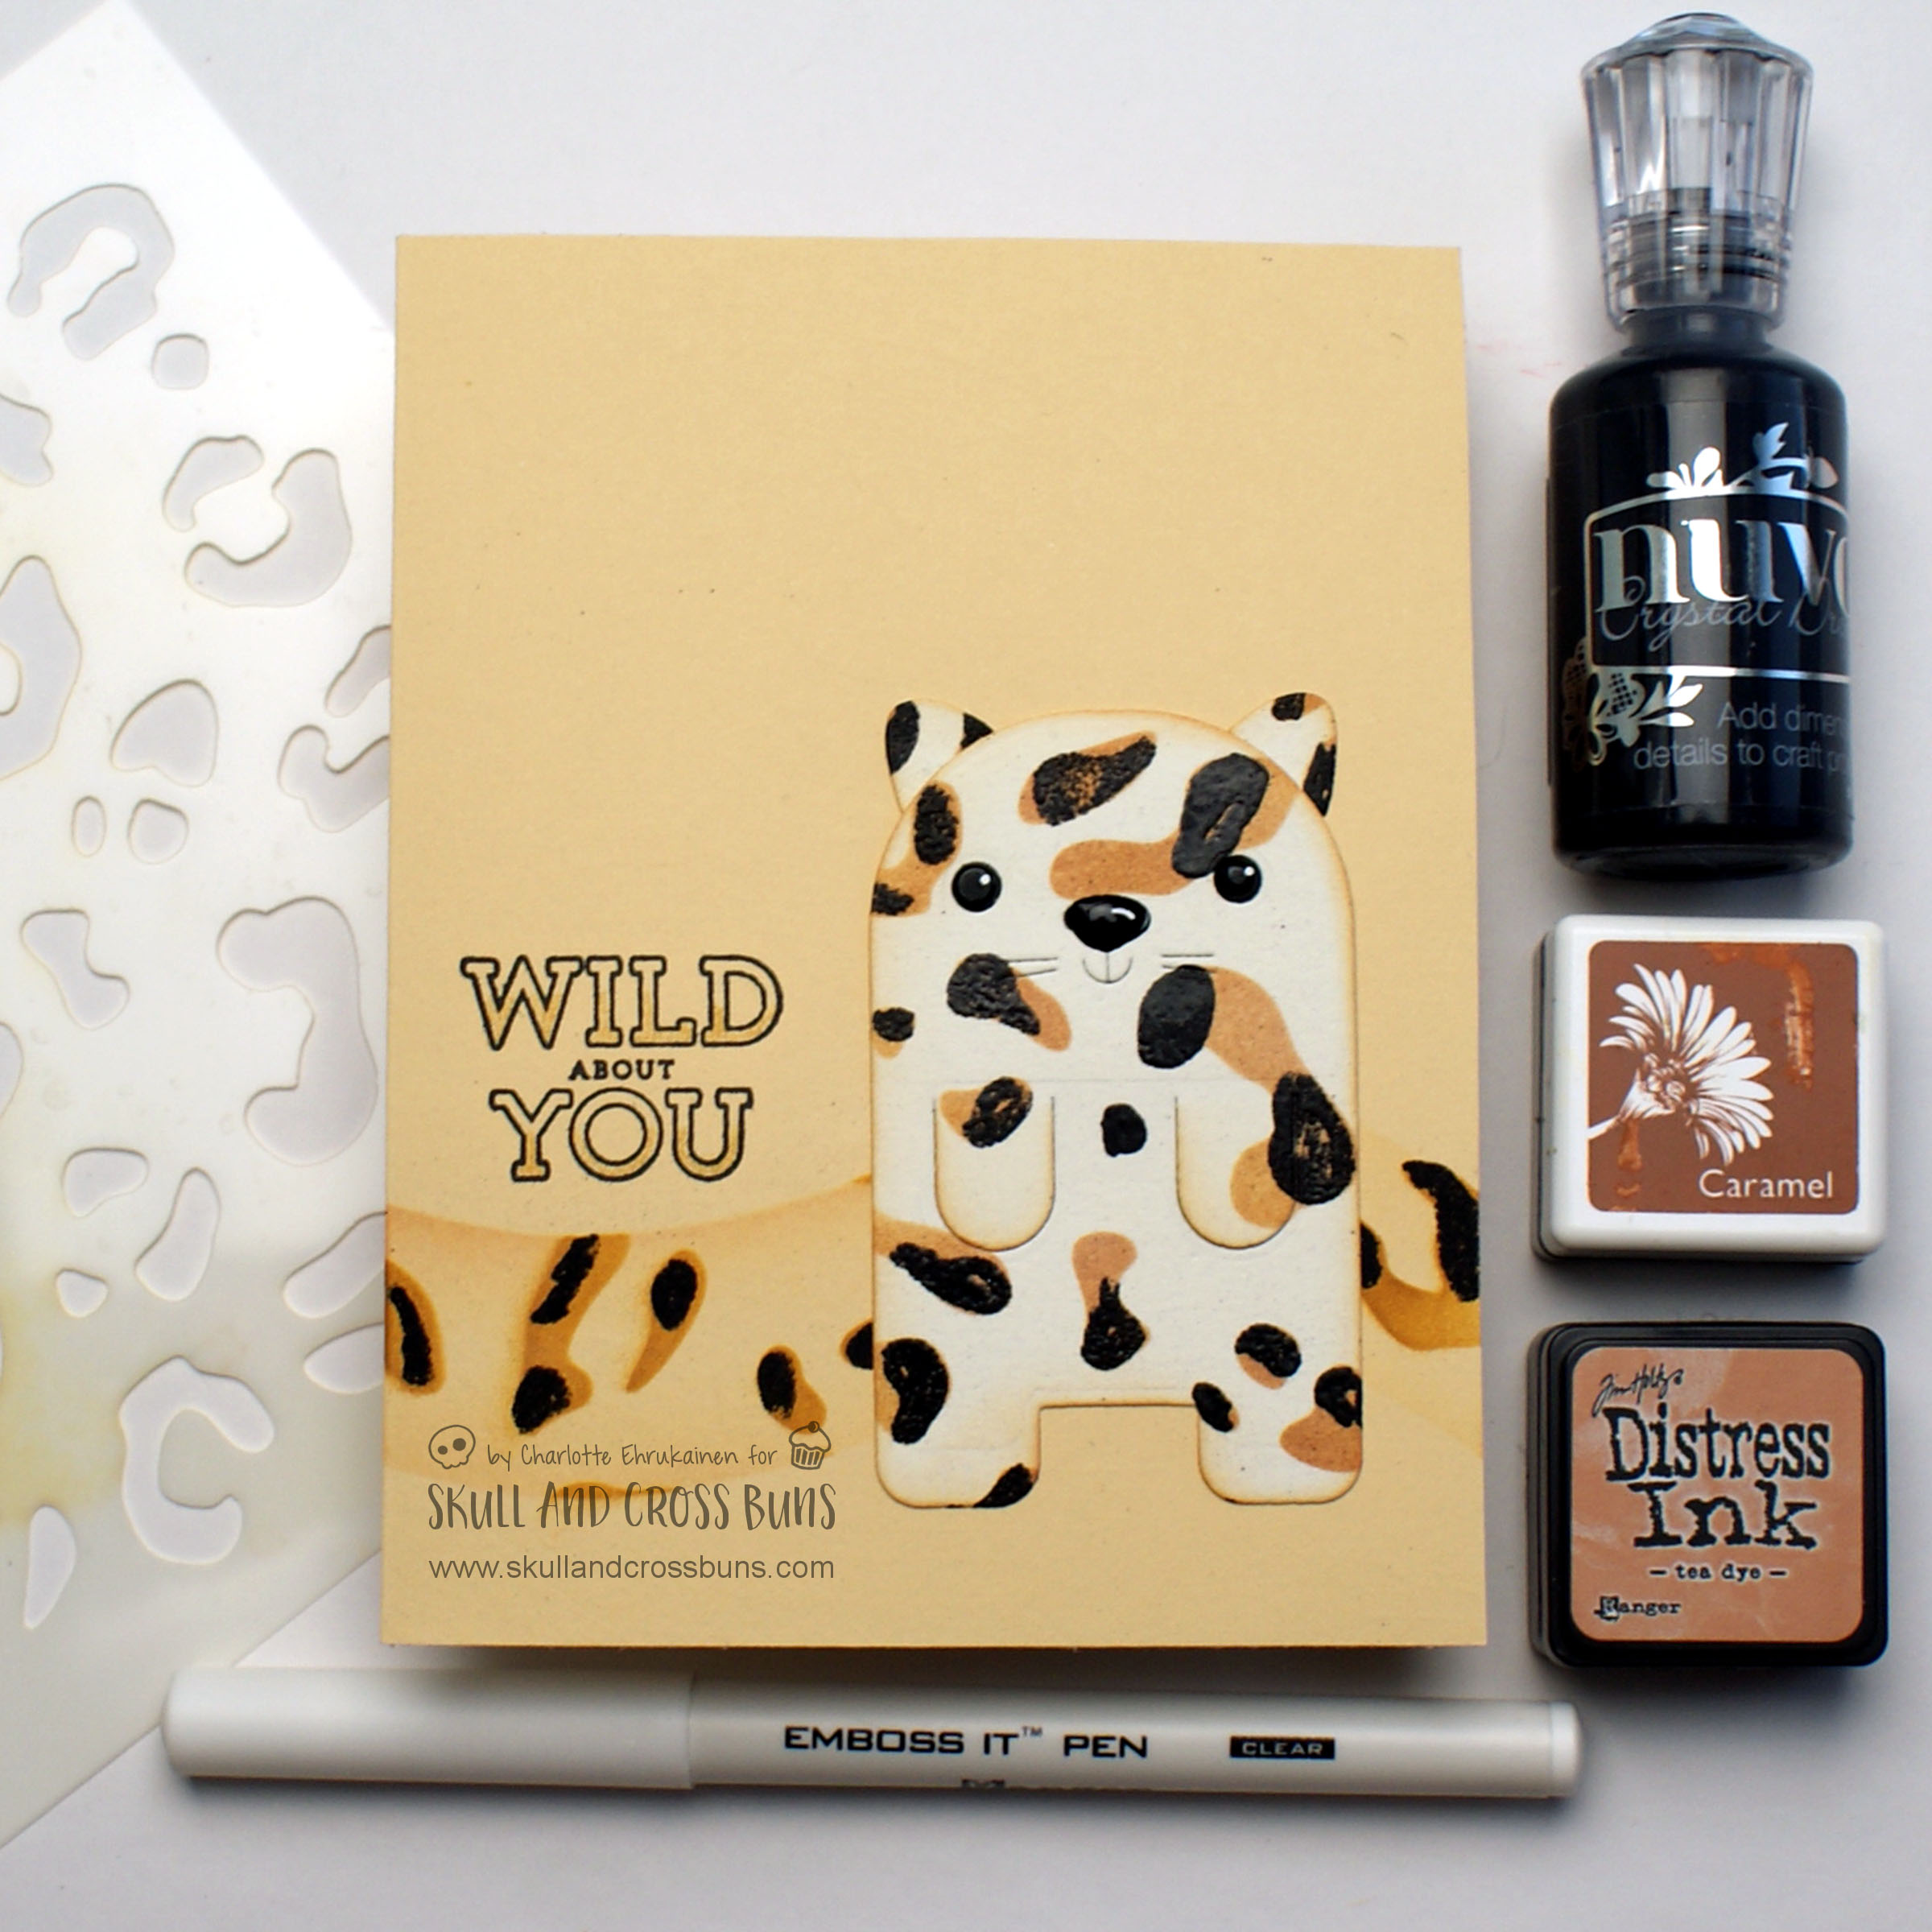
For the leopard stencil and my fourth card I first did regular ink blending through the stencil with Caramel ink from Hero arts. I then used an embossing pen to add ink to select areas of the stenciling and heat embossed them in black. I added a little more colour to the stenciled area (which I’d masked out prior to starting) with Tea Dye ink.
I finished the card by doing the same stenciling technique on a snippet of cream card which I’d die cut with Your Next Stamp’s Cute Cat Bookmark dies. I added detail to my leopard with some Tea Dye ink blended around the edges. I used Ebony Black Nuvo Drops to create the eyes and nose, and when they were dry I added shine marks with a white gel pen. Before adhering the leopard into place I added a sentiment from Simon Says Stamp’s Wild Cuddly Critters to the card base.
Challenges:
Crafty Gals Corner – Emboss It

HLS Anything Goes With Dies Challenge – Use Dies
SheepSki Designs – Animal Madness
Card 5 – Embossing Paste
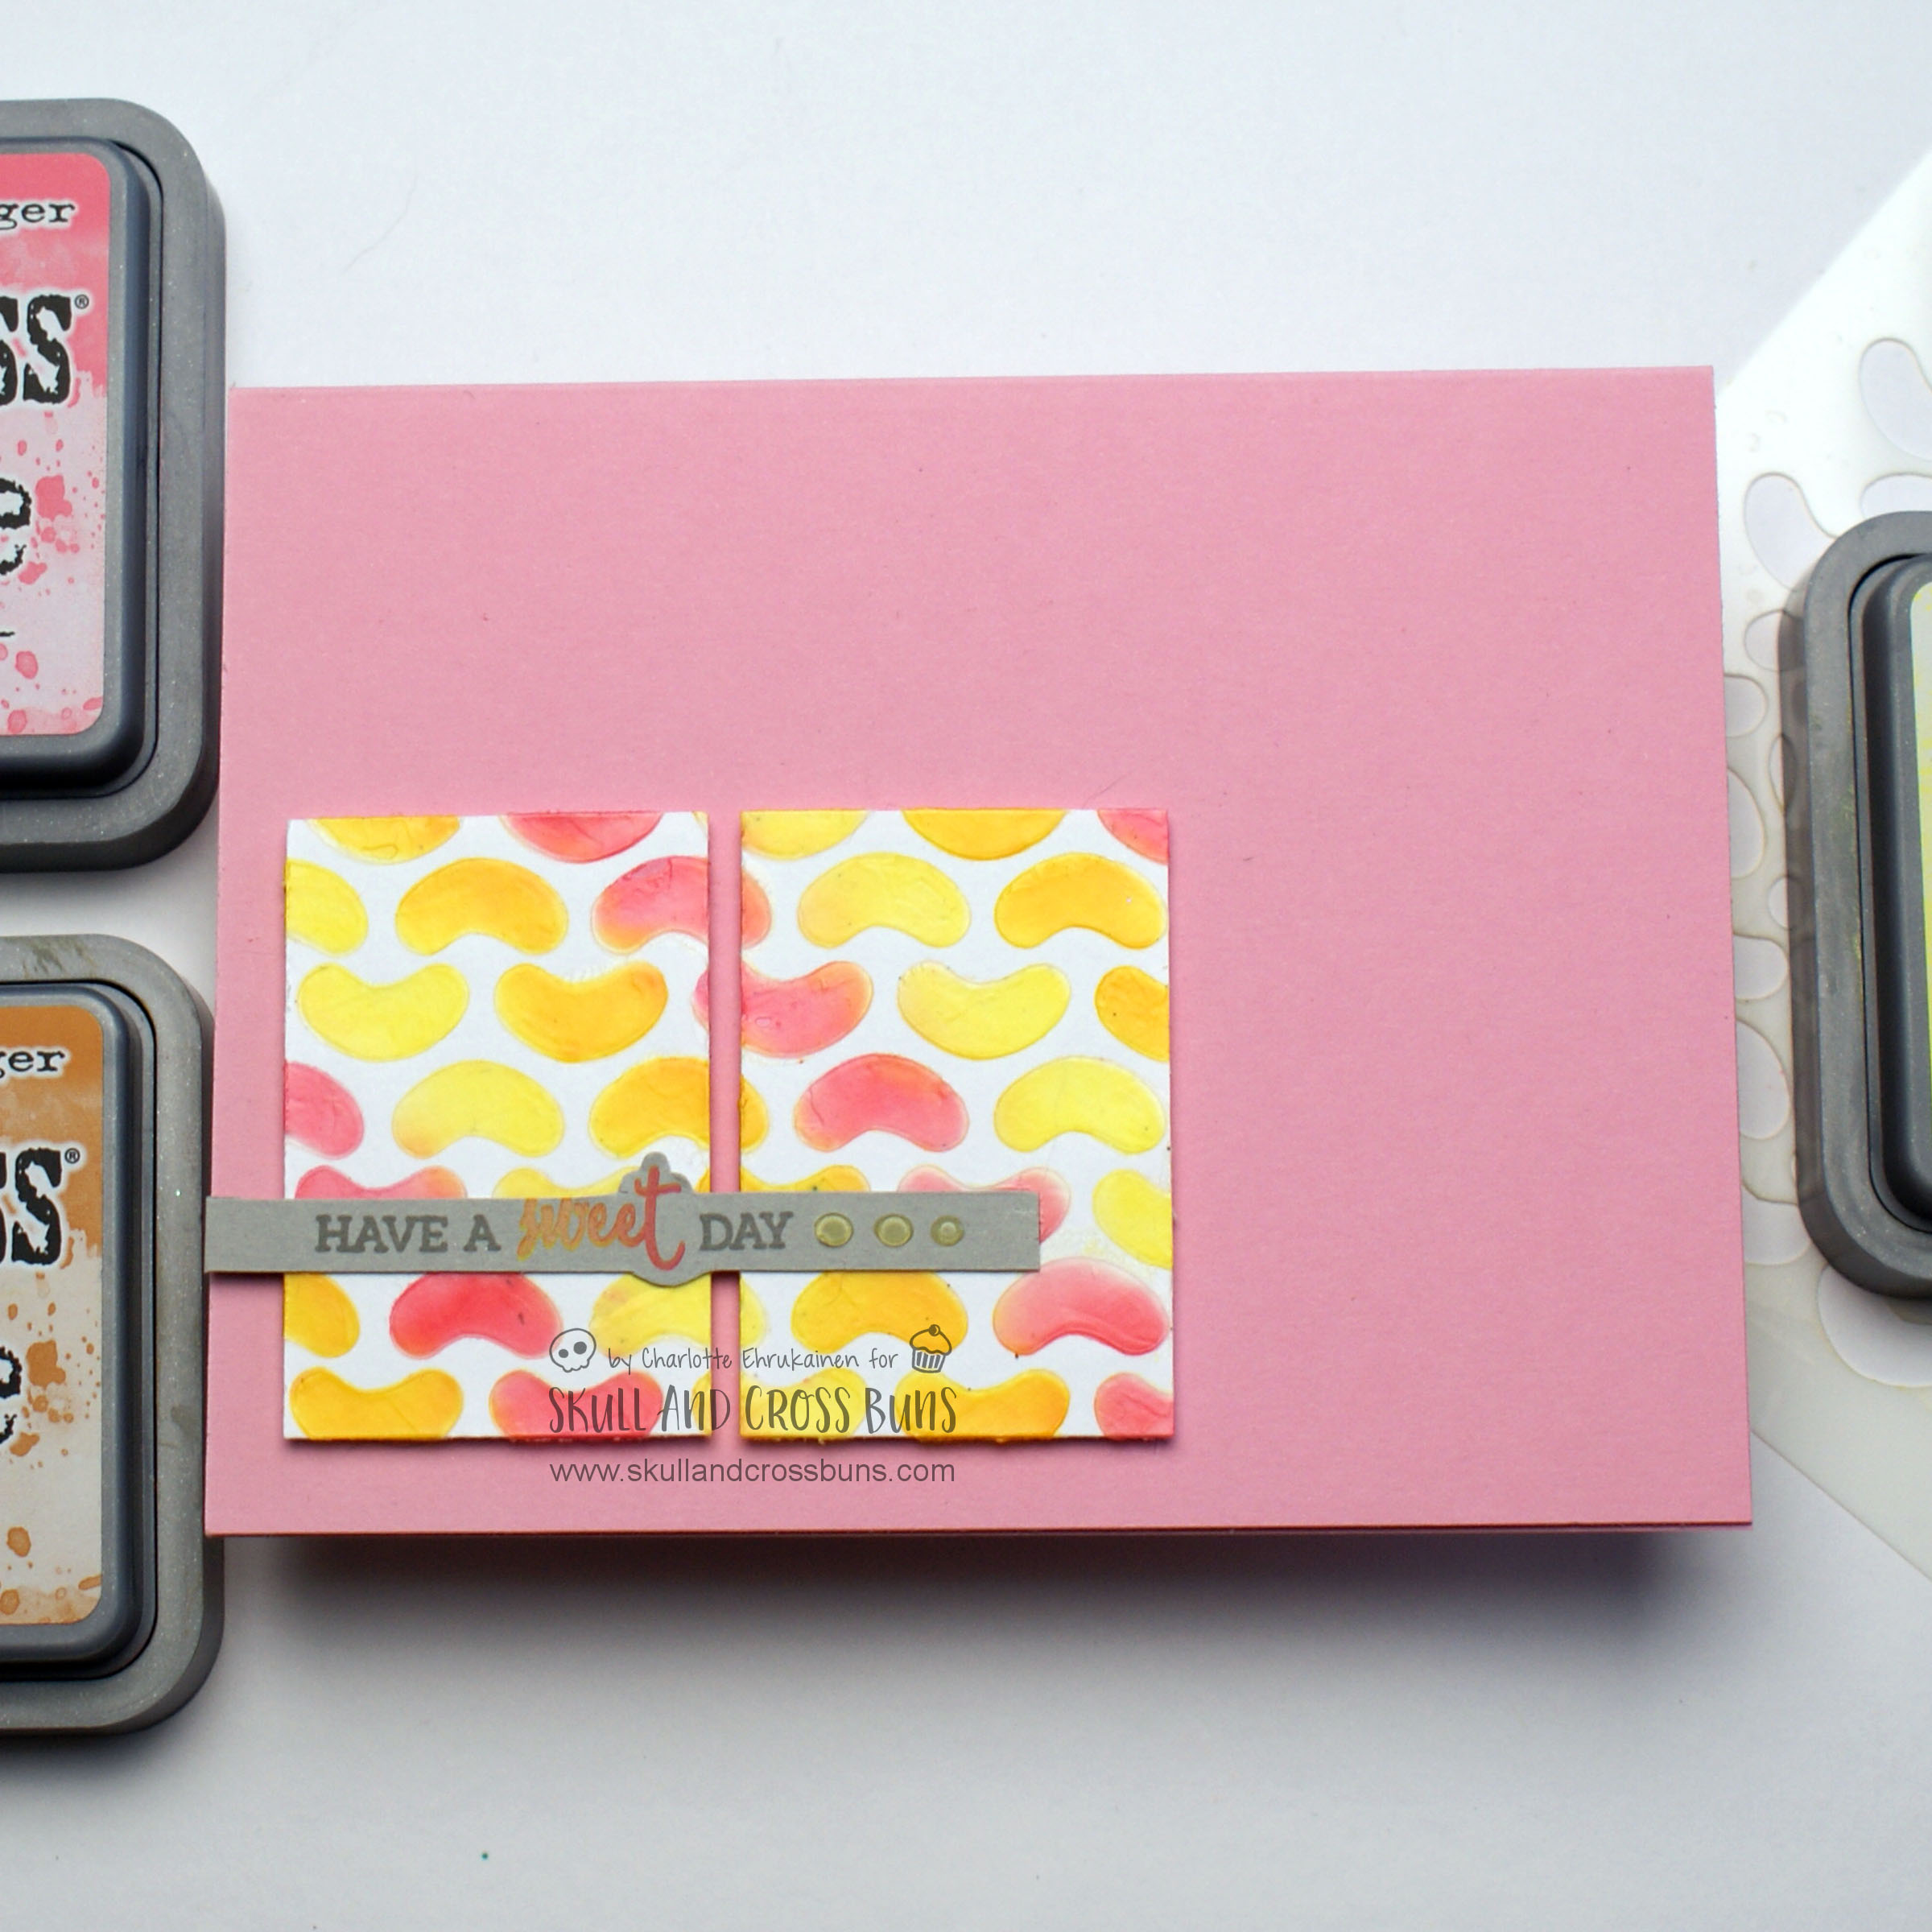
I used the Purl stencil for my final card, but I used the design to make jelly beans. I first ink blended through the stencil with Worn Lipstick, Wild Honey and Squeezed Lemonade using my Sponge Daubers. Leaving the stencil in place I then spread embossing paste (mine is DecoArt Media Modeling Paste in clear) through the stencil across the ink blended images. Once I was happy with the coverage I immediately removed the stencil and washed it, my palette knife and the craft mat, whilst I left the panels to dry.
I used a strip of grey card for my sentiment. I stamped the start and end with Catherine Pooler Twilight ink, then used the same inks I’d used for my ink blending to create an ombre look on the lettering of the word sweet. I trimmed the sentiment panel down, fussy cutting around the middle word. I assembled the card by popping up my dried jelly bean panels on foam tape and attaching the sentiment strip over them on the same level. I finished off with some Limoncello Nuvo Drops.
Challenges:
Allsorts Challenge – Feminine
Digi Choosday – Anything Goes

HLS CAS Challenge – Only 1/3
Simon Says Stamp Wednesday – CAS

TCP Tuesday Challenge – CAS
……….
I had a lot of fun playing with stencils to create this post! I hope you enjoyed seeing the different techniques, and maybe this has inspired you to pull out your own stencils and have a play. I would love to hear which of the cards is your favourite, and also which technique is your favourite – after all, your favourite card may not be the one that uses your favourite technique! If you do make any projects inspired by this post I’d love to see them – you can always tag me if you share on social media. And of course we love seeing what you make with your Skull and Cross Buns projects, too!
Love,
Lady Joyful

Beautiful cards all of them, sharing great use of stencils. Thanks for joining in the fun over at Digichoosday this week. Good luck.
LikeLiked by 1 person
Thank you 😊
LikeLike
They are all so beautifully done, great choice of colors and love the stencilling! Thanks so much for joining us at Allsorts challenge!
Ellibelle’s Corner
LikeLike
Thank you 🙂
LikeLike
Fabulous jelly beans Charlotte, so creative! Thanks for playing at HLS CAS, hope to see you join in with future challenges too.
LikeLiked by 1 person
Thank you 😊
LikeLike
Some fun techniques with stencils! I love the texture of the christmas card; it looks cozy. Thank you so much for playing along with the Rudolph Days Challenge.
Linda
DT Rudolph Days Challenge
LikeLiked by 1 person
Thank you 😊
LikeLike
Your bee card is super cute and what a great post with lots of information, techniques and designs… You’ve been one busy bee lol! The all yellow and black look in your bee card is so pleasing for the eye and perfect for a CAS design. Thank you for joining us at Less is More!
LikeLike
Thank you 😊
LikeLike
A beautiful assortment of cards Charlotte. Thanks for sharing your cute bee card with us at Less is More.
LikeLiked by 1 person
Thank you 🙂
LikeLike
beautiful Christmas card – I love the color combination – very different
thanks for joining us at HLS for our Christmas Challenge
LikeLiked by 1 person
Thank you 😊
LikeLike
Your arty card looks fabulous. Wonderful backgeound you made with the reverse of this stencil. I like it on the beautiful knit embossed background!
Great card!
Thanks for taking part in the August Rudolph Days Challenge.
LikeLiked by 1 person
Thank you 🙂
LikeLike
Love your “knitting” card! Thanks for joining us at Happy Little Stampers Watercolor Challenge
LikeLiked by 1 person
Thank you 😊
LikeLike
What a great idea you gave us with your stencils, your cards all are so lovely. Thanks for joining digichoosday challenge, greetings Petra
LikeLiked by 1 person
Thank you 😊
LikeLike
A gorgeous set of cards. Thank you for joining us for our Week 34 ‘Anything Goes’ Challenge at Polkadoodles.
Why not join our other other challenges at Digi Choosday and A Gem of a Challenge.
Hugs Lisa xxx
LikeLiked by 1 person
Thank you 😊
LikeLike
Super stencil techniques – really will have to try!!
Thank you for sharing with Crafty Hazelnut’s Weekly Christmas Challenge!
Susan
DT for CHNC
Calling All Crafters! – My personal Blog!
LikeLiked by 1 person
Thank you 😊 I’m glad you enjoyed the techniques.
LikeLike
Awesome ways to use stencils! The leopard print you created is so fun and funky!
Thank you for joining us at Crafty Gals Corner for our Embossing challenge.
LikeLiked by 1 person
Thank you 🙂
LikeLike