
Hello! It has been a very long time since I last shared here. I completely lost my mojo for a while and took breaks from most of my Design Teams. I’ve gradually been getting back to crafting and if you follow any of the challenges I design for you may have seen some cards I’ve made, but I still hadn’t managed to get back to sharing here on my blog or social media. One step at a time. Today I thought I’d give the blog a go, and maybe this will go up on Instagram too.

This is my reminder card for the latest Cupcake Inspirations Challenge. Our theme for this challenge is Valentine Hearts and we are sponsored by Digi Doodle Studios who are offering a prize of 3 digital stamps of the randomly drawn winner’s choice. They also kindly provided the team with digis to use for the challenge. I used that on my card for week one, but for this card I decided to use a different digi which I already had in my stash. This one is called Lovey, and seemed a perfect fit for the challenge.
Tip: When die cutting with a large, open die such as a square or rectangle, turn your die to run through at an angle, so that a corner goes through first rather than a flat edge. This will reduce the clunking noise, make your paper less likely to shift, and cause less stress on your machine.
I started by sizing the digi in word and printing onto a large snippet of alcohol marker friendly paper. I then searched through my dies to find a suitably sized square die. The particular die I picked out is retired, so I don’t have a link for it, but any die you have on hand would do. This one has slightly rounded corners which soften the design nicely. A square with stitching or similar could also work nicely although in my case the spacing around the image was pretty tight and such decorative edging may have interfered with the image.
With the image panel cut out I started on my colouring. I used my Spectrum Noir Illustrator markers for the colouring, and referenced a previous card I made (scroll down here!) for colour combinations for the hair and skin.
For the other colours I decided I wanted to go with a pinky-red and black colour scheme. I used dark Ice Greys for the black elements. I don’t have very many red pens, so I used my only Dark Red pen with a couple of Magentas to colour my red elements. I finished off the image with a light sweep of my lightest Ice Grey to create the case shadow for grounding my image. I then set the panel aside.
I knew I wanted to ink blend my background, having the colour fade to white as it went down the card base. I chose Catherine Pooler’s Party Dress ink and a large, soft brush and ink blended directly onto the white card base, concentrating the colour at the top, and fading it out towards the bottom edge. Once I was happy with the colour I set the card base aside too.
A heart seemed the perfect choice for my little sentiment focal element. First I had a look through my stamps to try and find a suitable sentiment. Ordinarily I would have checked the Color My Life app to quickly and easily search for a stamp, but unfortunately my new phone is giving an error when I try to log in… Hopefully customer support will be able to help me sort it out! In any case, I had to manually search through my stamps which means there might have been a better option that I overlooked, but the one I ended up picking worked well enough. It is from a now retired CAS-ual Fridays stamp set (check out how I used the same stamp set to create a card with a Nuvo Drop Focal Point here.)
For the heart itself I die cut a small snippet of white card and used direct to paper to colour it up with the Party Dress ink. Using the direct to paper technique resulted in a much darker shade than the ink blending, but at least it coordinates! I then stamped the sentiment onto it (doing partial stamping to split it across two lines) with Versafine Onyx Black ink.
With all the elements ready I could start assembling. I decided to pop up the focal panel. I no longer use foam tape (unless I’m using up leftover little bits that I received in kits, for example) as it is not good for the environment. Instead I added my dimension by cutting down a piece of board that I’d saved from the cover of an old diary. It gave just the right amount of dimension. I adhered it to the back of the image panel, then attached that down onto my card base, using my T-Square ruler to check the positioning. I then taped the heart onto the bottom corner, very slightly overlapping the edge of the panel.
As a final touch to complete the card I added some Love From Lizi Black Pinstripe Peel-Offs in the narrowest size. I made five lines, as odd numbers look best. I lined them up as best as I could, again using my T-Square ruler. The strips don’t actually go the whole way across the card, rather being shorter pieces that just tuck under the edge of the image panel, which reduces some waste.

I enjoyed creating this card and it turned out pretty much how I was imagining when I had the idea for the design. I hope it inspires you to come and join in with our challenge. You can find further inspiration from the rest of the Design Team on the challenge site or directly at their blogs via the links below.
Love,
Charlotte E (Lady Joyful) 
|
*Affiliate links may have been used in this post. For more details on affiliate links as well as other ways to support me, visit this page.*
Challenges included:
Creatalicious Challenges – Anything Goes
Cupcake Inspirations Challenge – Valentine Hearts
Daring Cardmakers – My Sweet Valentine
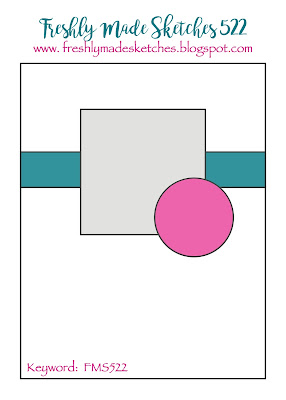
Freshly Made Sketches – Sketch
Check out what the rest of the DT made:
Charlotte (that’s me!)

Such a sweet image! I love the fading pink background you created for her! Thank you for playing along with us at Freshly Made Sketches.
LikeLiked by 1 person
Thank you 🙂
LikeLike
Beautiful card and coloured so fabulously! Thanks so much for joining us at Freshly Made Sketches.
LikeLiked by 1 person
Thank you 🙂
LikeLike
WOW, I love your colouring, just stunning. Thanks for joining in at the Daring Cardmakers. x
LikeLiked by 1 person
Thank you 🙂
LikeLike
What nice, cute, creative Valentine cards. Very nice
LikeLiked by 1 person
Thank you 🙂
LikeLiked by 1 person
You’re Welcome.
Glad you’re posting again
LikeLike